The Apple Studio Display is a high-end monitor that offers excellent image quality, a sleek design, and a variety of features that make it ideal for creative professionals.
If you have a Mac Mini, you can easily connect it to the Studio Display to create a powerful and versatile workstation.
In this article, we will walk you through the steps on how to connect a Studio Display to a Mac Mini. We will also provide some tips on how to get the most out of your new setup.
Here’s what you’ll need:
- A Studio Display
- A Thunderbolt 3 or Thunderbolt 4 cable (the Studio Display generally comes with a 1mtr Thunderbolt cable in the box)
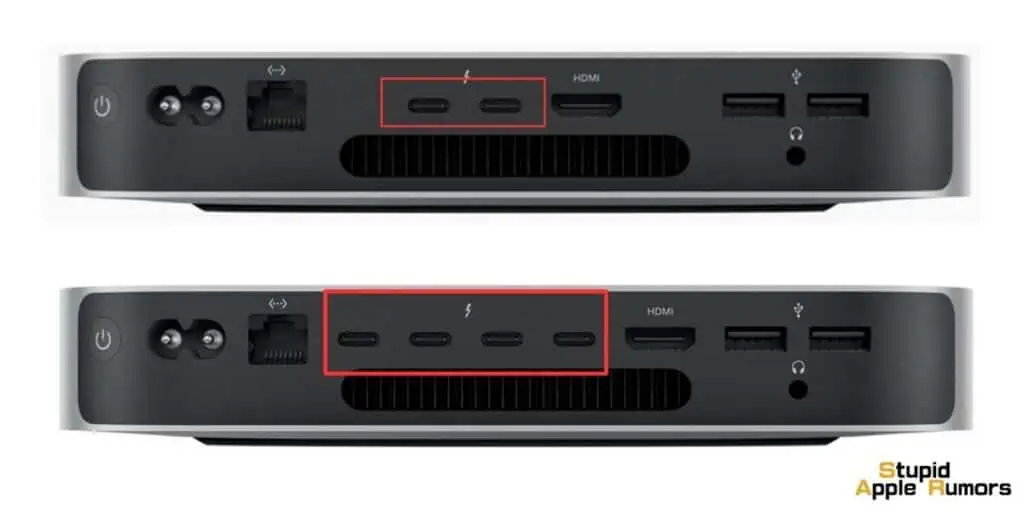
- A Mac Mini with a Thunderbolt 3 or Thunderbolt 4 port (Mac Mini 2018 and later)
Also check out: How to Connect Multiple HomePods to a Mac | Quick Guide 2023
Here’s Steps on How to Connect A Studio Display to a Mac Mini
Table of Contents
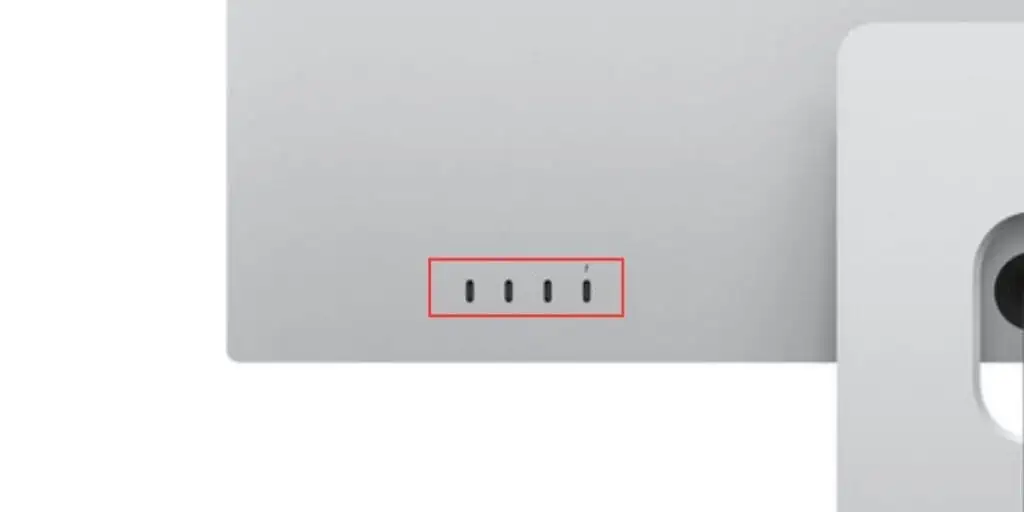
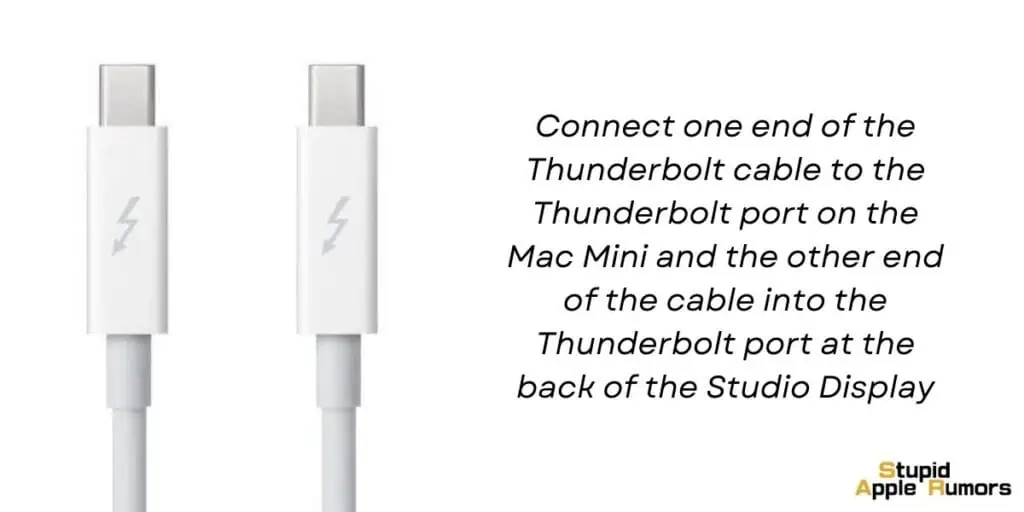
Start by Connecting the Thunderbolt Cable
- Locate the Thunderbolt port on the back of your Studio Display.
- Insert one end of the Thunderbolt cable securely into the Thunderbolt port on the Studio Display.
- Connect the other end of the cable to the Thunderbolt 3 or Thunderbolt 4 port on your Mac Mini.
- Ensure it fits snugly.
Next, Plug in the Power Cable
- Take the power cable provided with your Studio Display.
- Plug one end into the power input on the back of the Studio Display.
- Connect the other end to a power outlet.
Your Studio Display should power on automatically. If it doesn’t, double check the power supply and if the right cable and ports are being used.
How to Connect Multiple Studio Displays to a Mac Mini (2023)?
The steps to be followed are pretty much the same as what’s mentioned above. However, the number of displays you can connect to the Mac Mini solely depends on what processor is powering the Mini.
For example, in 2023 Apple released the new Mac Mini with the M2 and M2 Pro chips. With these two processors, you can connect up to three Studio Displays to a Mac mini with the M2 Pro chip, and up to two Studio Displays to a Mac mini with the M2 chip.
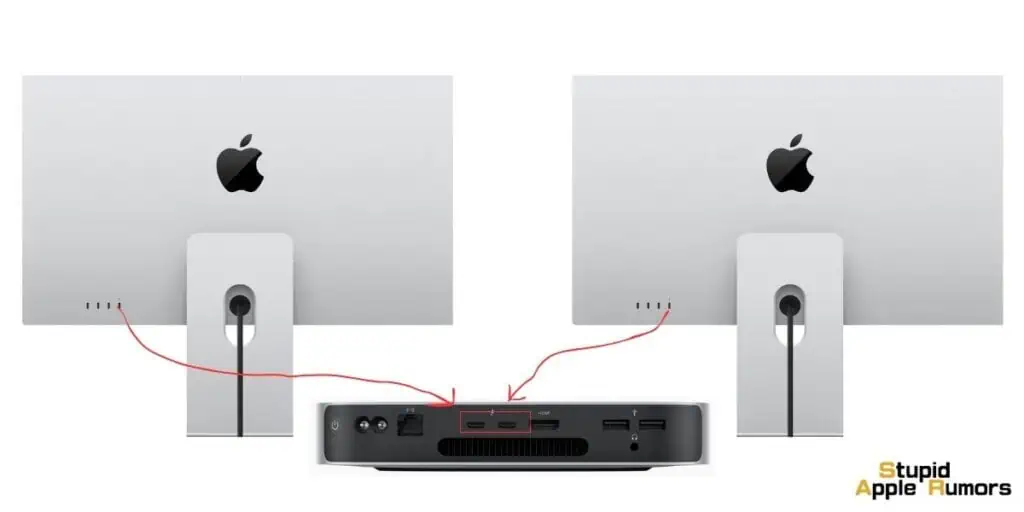
In order to do this, plug one end of a Thunderbolt cable into the Thunderbolt port on the back of each Studio Display. Plug the other end of each cable into a Thunderbolt port on your Mac mini.
Proceed to plug the power cable into each Studio Display and connect it to a power outlet.
Once done, the Studio Displays will turn on automatically if the configuration is correct.
How to Configure the Studio Display with a Mac Mini?
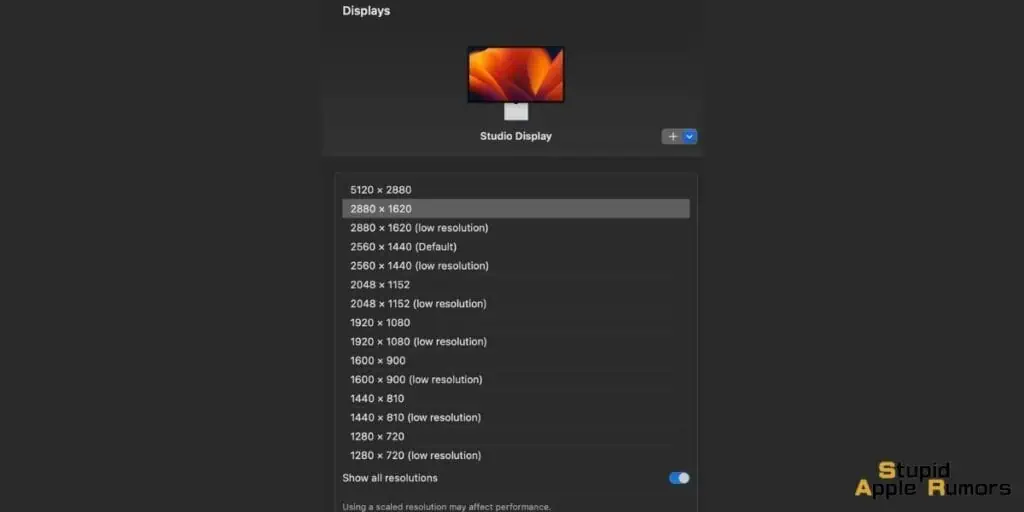
To configure the Studio Display with a Mac mini, follow these steps:
- Connect the Studio Display to your Mac mini using a Thunderbolt cable.
- Turn on the Studio Display.
- Open System Settings on your Mac mini.
- Click on Displays.
- In the Displays window, select the Studio Display.
In the Displays settings window, you can adjust the following settings for your Studio Display:
- Resolution: Choose the resolution that you want to use for the Studio Display.
- Brightness: Adjust the brightness of the Studio Display.
- Color: Adjust the color settings for the Studio Display.
- Arrangement: Choose how you want to arrange your displays.
- Other settings: You can also adjust other settings for the Studio Display, such as the scaling, rotation, and refresh rate.
You can also configure the Studio Display’s built-in camera and microphone in System Settings. To do this, click on Camera and select the Studio Display as the camera input device. Then, click on Sound and select the Studio Display as the microphone input device.
Also check out: Mac Studio Review 2023 | The Ultimate Apple Silicon Mac?
Additional tips for configuring the Studio Display with your Mac mini:
- If you are using multiple displays, you can choose to arrange them in a variety of ways.
- To do this, click on the Arrangement tab in the Displays settings window and drag and drop the displays to the desired arrangement.
- You can also use the Studio Display’s built-in camera and microphone for video conferencing and other tasks.
- To do this, open the app that you want to use the camera and microphone with and select the Studio Display as the camera and microphone input devices.
- If you are having trouble configuring the Studio Display, you can contact Apple support for assistance.
Why is My Studio Display Not Connecting to My Mac Mini?
If your Studio Display is not connecting to your Mac Mini, there are a few things you can try:
- Make sure that the Studio Display is connected to the correct port on your Mac Mini. The Studio Display uses a Thunderbolt cable, so make sure that you are connecting it to a Thunderbolt port on your Mac Mini.
- Try restarting your Mac Mini and Studio Display. This can often fix simple connection problems.
- Make sure that your Mac Mini is running macOS 12.3 or later. The Studio Display is not compatible with older versions of macOS.
- Try using a different Thunderbolt cable. If the cable that you are using is damaged, it may be preventing the Studio Display from connecting to your Mac Mini.
- Try connecting the Studio Display to a different Thunderbolt port on your Mac Mini. If the port that you are using is not working properly, the Studio Display may not be able to connect.
- Try resetting the Studio Display. To do this, turn off the power supply and disconnect the cables. Wait for 10 seconds and then reconnect everything and try again.
If you are still having problems connecting the Studio Display to your Mac Mini, contact Apple support for assistance.
Connecting a Studio Display to Mac Mini FAQs
Does the Studio Display have a power button?
No, the Studio Display does not have a power button. It turns on automatically when you connect it to your Mac mini.
What resolution and refresh rate can the Studio Display support when connected to a Mac mini?
The Studio Display can support the following resolutions and refresh rates when connected to a Mac mini:
- 6008×2536 at 60Hz
- 5120×2160 at 60Hz, 120Hz, or 144Hz
- 4480×2520 at 60Hz
- 4096×2304 at 60Hz
- 3840×2160 at 60Hz
Can I connect multiple Studio Displays to a Mac mini?
Yes, you can connect up to three Studio Displays to a Mac mini with an M2 Pro chip. You can connect up to two Studio Displays to a Mac mini with an M2 chip.
How do I arrange multiple Studio Displays on my Mac mini?
To arrange multiple Studio Displays on your Mac mini:
- Open System Settings.
- Click on Displays.
- Click on the Arrange tab.
- Drag and drop the displays in the arrangement you want.
My Studio Display is not displaying the correct resolution. What should I do?
To change the resolution of your Studio Display, follow these steps:
- Click on the Apple menu in the top left corner of your screen and select System Preferences.
- Click on Displays.
- Click on the Display tab.
- Select your Studio Display from the list on the left.
- Use the Resolution slider to select the desired resolution.
- Click on Close.
What are the benefits of using a Studio Display with a Mac mini?
The Studio Display offers a number of benefits for Mac mini users, including:
- A high-resolution 5K display with wide color support and True Tone technology.
- A built-in 12MP camera with Center Stage and a six-speaker sound system.
- Three USB-C ports for connecting accessories.
- A simple and elegant
Conclusion
Connecting a Studio Display to a Mac Mini is a straightforward process that enhances your workspace with exceptional visuals and audio capabilities.
By following the step-by-step guide and implementing the additional tips provided, you can seamlessly integrate these powerful tools for an elevated computing experience.
Remember to ensure compatibility, use the correct cables, and optimize display settings to suit your preferences.
With this setup, you’ll unlock a new level of productivity and creativity in your Mac Mini-powered workstation.
Related

