Virtual Private Networks (VPNs) have been around for a while now. They are tools that are designed to give users a safe, private connection.
While I am sure many have heard about it or stumbled across the VPN settings on your iPad, I am willing to bet the majority of these people don’t know or even cared to use it.
I can’t blame anyone because for many years even I was in that category, but once I did my research about VPNs, it is one of the most visited settings on my iPad. I use a VPN all the time on my iPad and while there were some hiccups at the start, I learned how to use them.
I am glad I did, because I am a little paranoid about my safety on the internet, and privacy is everything to me.
This article is a guide on how to set up a VPN on an iPad and guess what, it’s a lot easier now compared to a few years back. Read on to find out How to Setup VPN on iPad.
After having reviewed Apple’s official documents and having reviewed information from our credible sources; my team and I found that:
For a straightforward VPN setup on your device, follow these steps:
For services like ExpressVPN, NordVPN, or TunnelBear, simply download the chosen app from the App Store. Once downloaded, open it and either sign up or log in.
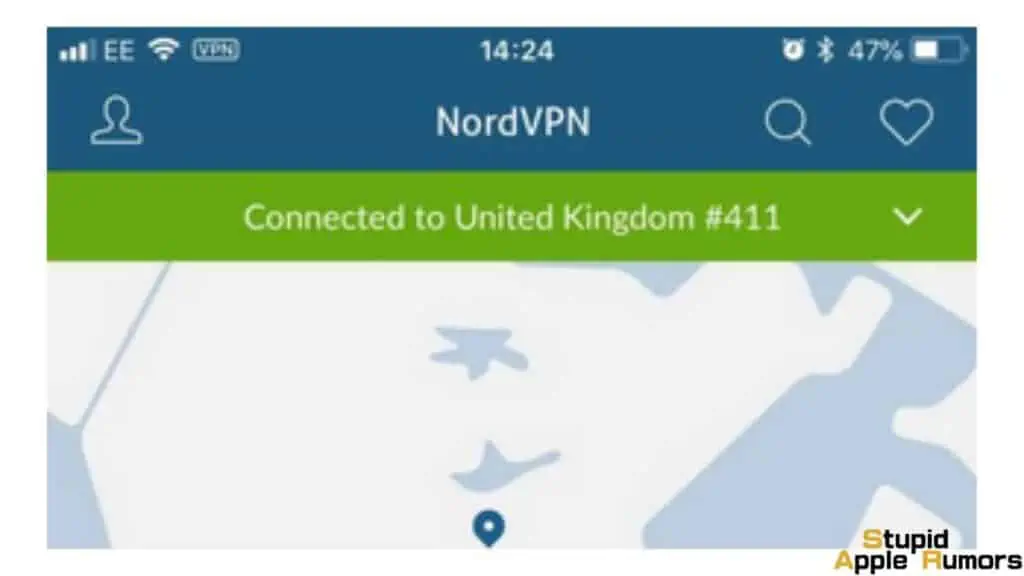
After granting the necessary permissions, pick a server and tap ‘connect’. You’ll know it’s active when you see a VPN icon in your notifications.
If you prefer a manual setup, navigate to Settings, then General, and select VPN. From there, tap “Add VPN Configuration” and choose the appropriate protocol.
Fill in the details given by your VPN provider and, if needed, set up proxy configurations. Activate the VPN through the General settings afterward.
Also Check Out: Does the Apple Vision Pro Have Controllers?
How to Setup VPN on iPad?
Table of Contents
To set up a VPN on your iPad, there are two main methods:
- Using a VPN Service Provider:
- Download a VPN app from reputable providers like ExpressVPN, NordVPN, or TunnelBear from the App Store.
- Open the app, sign up (if you’re a new user) or log in.
- Grant the app permission to configure VPN settings by entering your iPad’s passcode.
- Choose the server you want to connect to and tap the connect button. Once connected, a VPN icon appears on your notification bar.
- Manual Configuration:
- Go to the Settings app, select General, then VPN.
- Tap “Add VPN Configuration…” and select your desired VPN protocol (e.g., IKEv2, IPsec, or L2TP).
- Input the necessary server details provided by your VPN provider.
- Configure proxy details if necessary.
- Once set up, toggle on the VPN from the General settings.
Method 1 – How to Setup VPN on iPad Using a VPN Service Provider
VPN service providers have one goal, making the whole process intuitive, seamless, and easy for anyone. And most reputed VPN service providers do a great job making the whole process simple and straightforward even for new users. Their web services and apps for smartphones and tablets alike give easy access to a VPN with just a click.
- This carries on to iPads too, VPN services like ExpressVPN, NordVPN, and TunnelBear, some of the best providers have apps for iPads. These services come with free and paid plans. VPN service providers offer a lot of features that make using VPN joy for someone who is not very enthusiastic about tech.
- You can try the services using their free trial and see if they suit you, and work well, and then if you like them, you can pay for them. Paying for VPN service providers gives you access to more features, better speed, and removes data caps if there was any. Free VPNs are slow and come with very limited features.
But first, let’s see how to set up and use a VPN on an iPad using the app from a VPN service provider.
Step 1 Search for the VPN app on the App Store and install it on your iPad.
Step 2 Open the app you just installed, there might be slides explaining the features, read them to know more about the app.
Step 3 Most VPN apps will ask you to sign up if you are a new user, but you could just log in if you have used their service on other devices.
Step 4 Your iPad will ask for your passcode to authenticate your permission so that the app can configure your VPN settings.
Step 4 You can try the app for free if it has a trial or if you have already purchased the premium version, you can switch to the server you want.
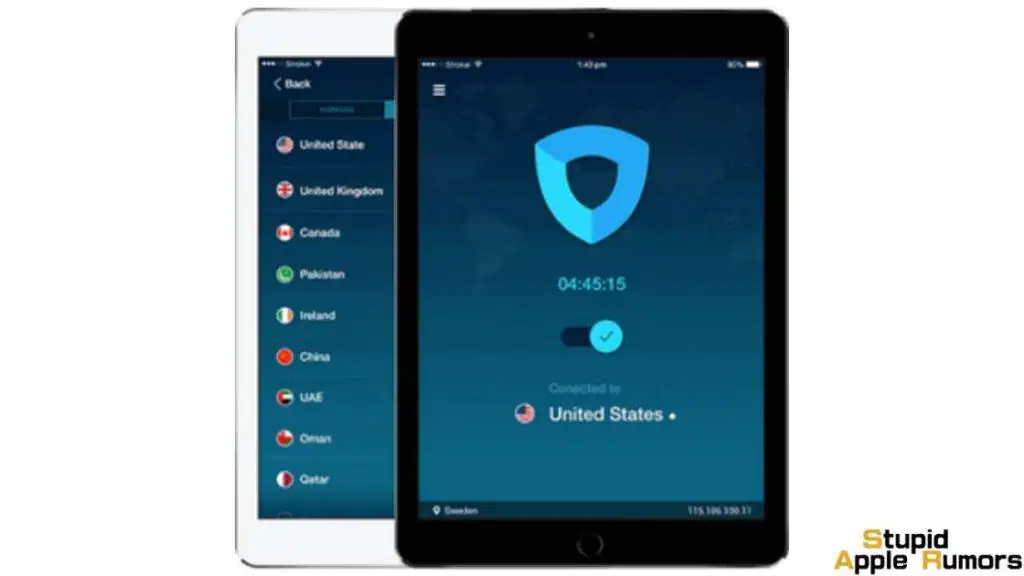
Step 5 You can now connect to the VPN and browse safely by just tapping on the connect button or switch (depending on the App). Once you are connected, a small VPN icon will appear on the notification bar of your iPad.
- Paying also gives you premium VPN access on multiple devices, be it a laptop, desktop or mobile devices like iPads.
- Along with this, you will get the option to choose from different servers all over the world so that you can access geo-restricted content or protect yourself from trackers.
- You get features like Kill Switch, which disconnects you from the internet if your VPN disconnects even for a second, making sure that your IP address or location is never exposed.
The one disadvantage of using a VPN over an app is the loss of battery life. So, make sure to turn off the VPN whenever you are not using it to conserve your iPads battery life. Sometimes VPNs can increase internet latency and usage, so it is better if you turn it on only when need.
Check out the latest iPad on Amazon!
Method 2 – How to Manually Configure VPN on iPad
Manually configuring VPN is a great way to find what you need and what suits you. It is not as easy to set up compared to using an app. In fact, it can be a lot harder or time-consuming. So then why would someone use this method?
- Tech-savvy people like to have full control over their VPN settings, and this is exactly what you get by manually configuring a VPN.
I will talk about the advantages this method holds over using the app of a VPN service provider, but first, let’s see how to manually configure a VPN:
Step 1 Open the Settings app on your iPad and select the General option in it.
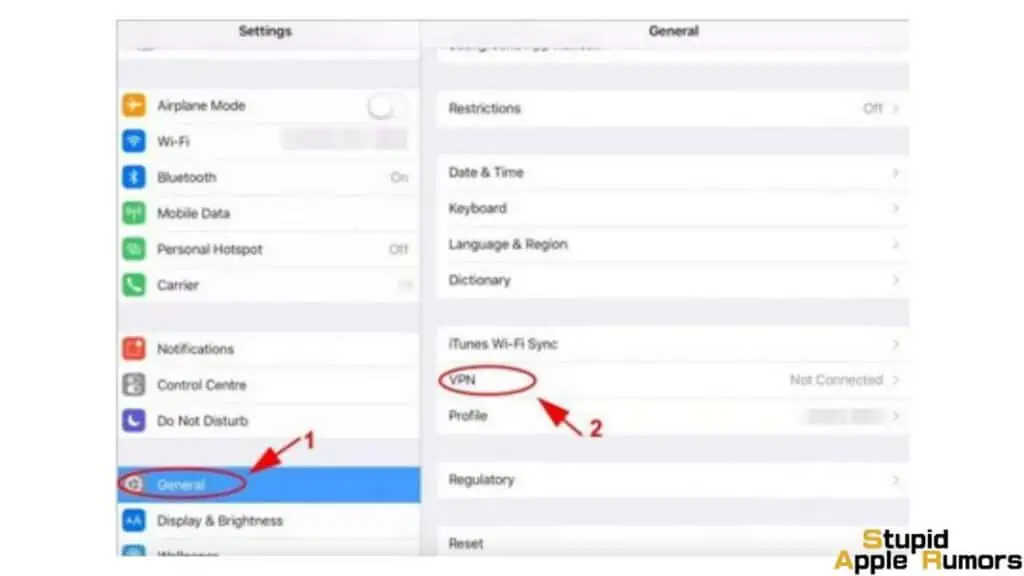
Step 2 Choose the VPN option.
Step 3 Now, tap on the “Add VPN Configuration…” option.
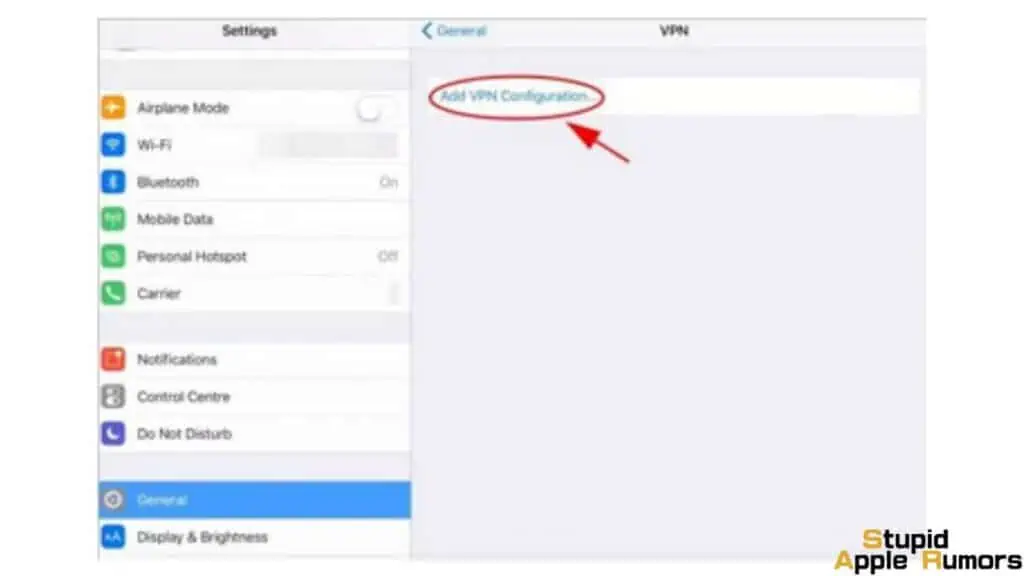
Step 4 Now, choose the type of VPN protocol you want to use. You can choose from IKEv2, IPsec, or L2TP. After choosing, go back to the previous screen.
Step 5 Fill up the server details. Server details depend on the tunnel protocol you choose. You need Description, Server, Remote ID, Local ID, Account, Password, and Secret depending on the protocol you chose.
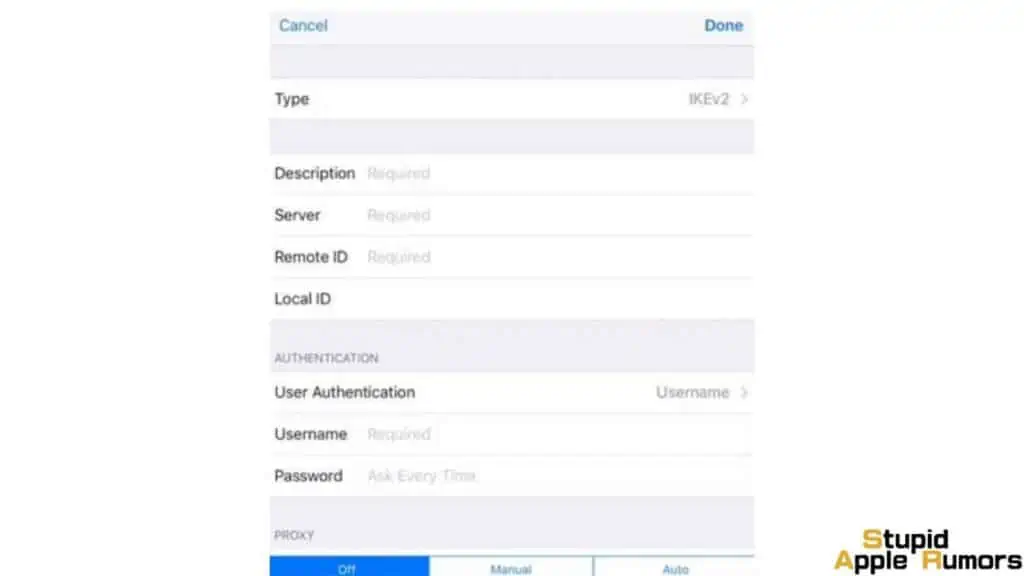
- Description: Enter a name for your VPN connection, such as OpenVPN, NordVPN, etc., to differentiate it from other configurations.
- Server: It is either the Domain name or IP address.
- Remote ID: This is the hostname; you will need to get it from the VPN provider.
- Username: the username of your VPN service account.
- Password: Your password for your VPN service.
- Local ID: This is mostly left empty.
Step 6 Now fill in the server details.
Step 7 You can also configure proxy details at the end of the page. Here, you can specify server, port, and authentication settings too. Use the Auto option to enter the URL.
Step 8 Tap Done when you are done configuring the settings.
Step 9 To use the configured VPN, open the Settings app on your iPad, go to General and then tap on VPN.
Now, that you have configured a VPN on your iPad, follow these steps to use it.
Step 1 There is a toggle switch in here which turns VPN on and off. Choose the VPN you configured and toggle it on.
Step 2 If you have multiple configurations set up, choose the VPN you want to use. If you have only one VPN set up, it will be chosen by default.
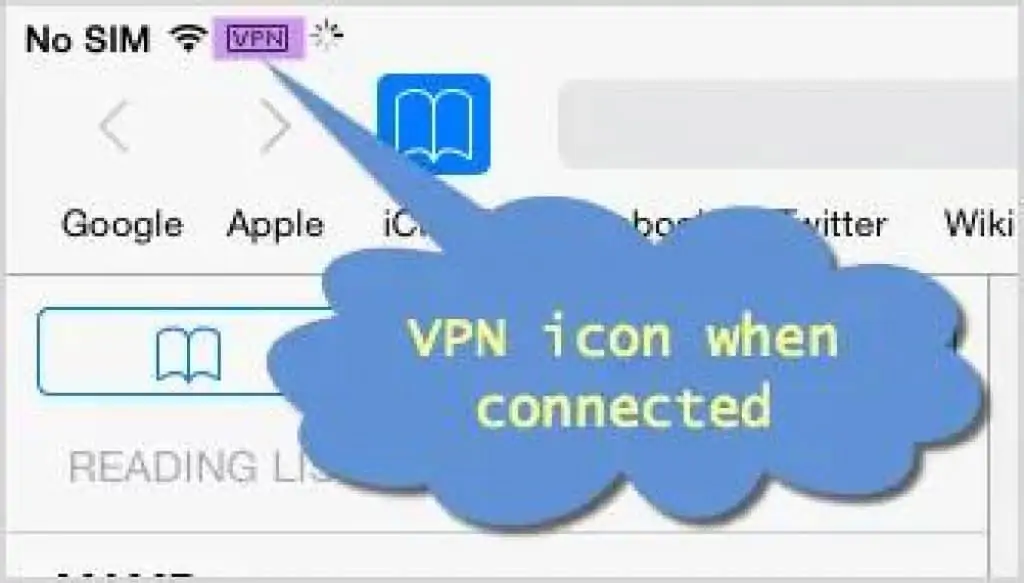
Step 3 To know you are connected, a VPN symbol will appear in your iPad’s notification bar. Once you are connected, you are safe to browse the web.
- So, now you see why this is a lengthy, tedious process that is not convenient for everyone. But this method has its advantages too.
- Firstly, you can use free and open-source VPN service providers like OpenVPN. Then you can configure your VPN connection to the best servers and locations if you don’t want to compromise on internet speed.
And finally, since this is a system configuration, there is zero or minimal hit to the battery life of your iPad which is a huge advantage. These are also used by companies to give access to their servers when they are off-site.
Check out the latest iPad on Amazon!
HOW TO SETUP VPN ON IPAD – Final Thoughts
Virtual Private Networks or VPNs as they are popularly called are great tools for someone who is always connected to the internet. And if that someone, is you, I am sure anyone reading this article is, you need to use it.
VPNs are a platform to ensure that you are safe and secure on the internet. They help by masking your IP address which makes you anonymous to prying eyes like trackers and websites.
If you are someone who has heard about VPNs but didn’t know how to use them on your iPad, well, now you know. So, go ahead and make your internet connection secure, private and safe. Remember, you can never be too careful and you need to be as careful as you can on the internet. A VPN is one of the best ways to ensure it.
Check out the latest iPad on Amazon!
How to Troubleshoot VPN Not Working on iPad?
Here are some troubleshooting steps you can take if your VPN is not working on your iPad:
- Verify Internet Connection: Before assuming the issue is with the VPN, ensure your internet connection is strong and stable. Attempt connecting to a different Wi-Fi network or switch to cellular data to test the connection.
- Restart Your Device: A basic yet effective solution is simply restarting your iPad. Once restarted, try accessing your VPN again.
- Re-establish VPN Connection: On occasion, disconnecting and then reconnecting to the VPN refreshes the connection. Navigate to your VPN app, tap ‘disconnect’, wait a few moments, then tap ‘connect’.
- Update the VPN App: Outdated apps can have glitches. Ensure your VPN app is up-to-date by checking for any available updates in the App Store.
- Reset Network Settings: By resetting network settings, you’ll revert all network-related preferences and settings to their defaults, including VPN configurations. To proceed, go to Settings > General > Reset > Reset Network Settings. Note: This will also remove Wi-Fi passwords and other network settings.
- Reach Out to VPN Provider: If you’ve exhausted the above steps and still face issues, it’s time to get in touch with your VPN service provider. They might be aware of known issues or can provide specific solutions.
Additional Considerations:
- Server Overload: VPN servers can become overloaded, affecting connection quality or causing failures. Check the status or load of your selected server on your VPN provider’s website or app, and switch servers if needed.
- Incompatibility with Certain Websites/Services: Some websites or online services detect and block VPN traffic. If you’re facing issues accessing specific sites, try switching your VPN server or temporarily disconnecting from the VPN.
- Free VPN Limitations: If you’re using a free VPN service, be aware that they can be less reliable than their paid counterparts. Connection issues might be more frequent. If persistent problems arise, consider testing a reputable paid VPN to see if the experience improves.
Which VPN Settings are Available on iPads?
iPad like iPhones offers some of the best VPN services that connect to. You can connect using
L2TP – Layer 2 Tunneling Protocol
PPTP – Point to Point Tunneling Protocol
IPsec – Internet Protocol Security
| Setting | Description |
| IKEv2 MDM settings | Configure the VPN connection to use Internet Key Exchange, version 2 (IKEv2). |
| IPsec MDM settings | Configure the VPN connection to use Internet Protocol Security (IPsec). |
| L2TP MDM settings | Configure the VPN connection to use Layer 2 Tunneling Protocol (L2TP). |
| PPTP | PPTP is supported only on older devices running iOS 9 and OS X 10.11 or earlier. |
| Third-party connection type | There are third-party types of VPN connections. Some options are: Aruba VIA Check Point Mobile VPN Cisco AnyConnect Cisco Legacy AnyConnect F5 SSL Juniper SSL Pulse Secure Users must install both the configuration profile and an authentication app. You might find third-party VPN apps in the App Store. |
| Custom SSL connection type | For other SSL VPN solutions, contact the service provider and ask if they have an app. In such cases, choose Custom SSL. Make sure entails like the Identifier field matches the identifier provided by the VPN app. The identifier should be in reverse DNS format (for example, com.example.myvpn). You must install both the service provider’s app and the configuration profile to connect to your network. |
Using a VPN on your iPad has these advantages:
- You can browse the internet safely, securely, and privately without prying eyes on you.
- A VPN can mask your current location so that you are safe from trackers and websites.
- VPN keeps your information safe when on an insecure public Wi-Fi hotspot.
- You can access restricted videos/websites that are blocked in your region. Check out our guide on HOW TO SETUP VPN ON IPAD for all the details.
Check out the latest iPad on Amazon!
Is it a good idea to use a free VPN on your iPad?
While a free VPN might be tempting, I wouldn’t recommend installing one on your iPad for multiple reasons.
Firstly, free VPN don’t come with a zero-log policy and some even have data caps which can be frustrating.
Free VPN that are listed on the App store don’t offer the same level of security as a paid one and there are a limited number of servers you can connect to.
Also, there’s lack of support in case the VPN stops working and there are chances that because the level of security is so low that hackers and scammers can gain access to your system and track your online movements.
Does iPad OS come with VPN built in?
Unfortunately though iPadOS has had support for VPN since ver. 2.0, it does not come with a built-in VPN service.
The only way you can configure VPN on your iPad is by either downloading a premium VPN from the App store or if you know the DNS and configuration settings then you can manually create a VPN on your iPad from the VPN menu in the Settings app.
What is the best VPN for my iPad?
ExpressVPN, Surfshark and NordVPN are three of the best VPN applications available for iPadOS. These apps are paid apps, but they offer a limited trial period so you can experience what these apps have to offer before committing to one.
All three VPNs offer high download and connectivity speeds, provide robust security for your system and will keep your online presence invisible.
They also have hundreds of servers in multiple countries that you can connect to and gain access to geo-blocked content and websites on your iPad.
How to Share VPN from iPad to Mac?
For enhanced privacy and security, many individuals rely on VPNs, even on devices with robust security features, like Macs, which come equipped with tools like FireVault and Firewall.
If you’re already enjoying the benefits of a VPN on your iPhone or iPad, there’s no need to procure an additional VPN for your Mac.
Instead, you can easily share the VPN connection from your iPhone/iPad with your Mac.
Understanding VPN Sharing
VPN sharing refers to the technique of using one device’s VPN connection and extending that connection to other devices.
This process typically involves utilizing the hotspot feature on the primary device.
The advantages of VPN sharing include safeguarding data across all connected devices, especially useful on public WiFi, and financial savings as users can avoid purchasing multiple VPN subscriptions.
Furthermore, sharing a VPN allows users to bypass region-specific restrictions on streaming platforms and can prevent ISPs from throttling internet speeds.
Steps to Share VPN from iPad to Mac?
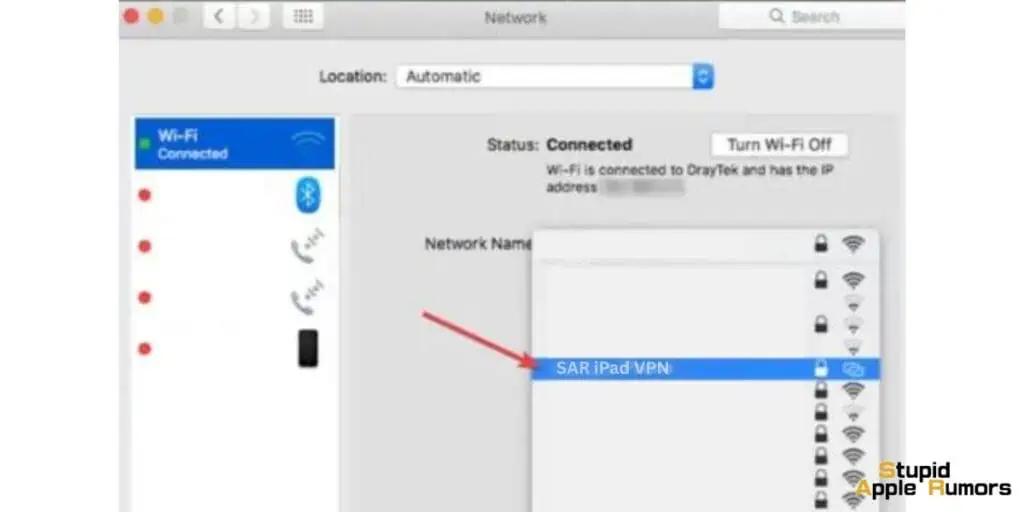
- On the iPad: Start by activating your VPN connection. If you’re using a built-in VPN:
- Open Settings and navigate to General.
- Select VPN and Device management.
- Tap “Add VPN configuration” and fill in the necessary fields.
- Return to Settings and choose Personal Hotspot. Configure and ensure its visibility.
- On the Mac: To utilize the shared VPN:
- Open the WiFi menu.
- Select your iPad’s hotspot from available networks and enter the required password.
- Final Step Verification: To ensure the VPN connection is shared correctly, visit whatismyipaddress.com on your Mac. If the displayed IP matches the VPN’s IP on your iPad, you’ve successfully shared the connection. Otherwise, there might be a configuration issue.
Also Read:
- How to Set Up Siri on iPhone
- How do AirTags work? How to Setup AirTags
- How to fix slow WiFi connection on iPhone
Alan Urban is the Editor-in-chief of Stupid Apple Rumours and often proclaims that he’s ” Apple’s number one fan.”
In addition to keeping up with the latest Apple news, he also reviews Apple products and creates user-friendly guides. When not subjecting Apple Devices to crazy stress tests, he’s usually playing games on Apple Arcade

