In today’s world, online privacy and security have become increasingly important. With the rise of cyber threats and data breaches, it’s essential to take necessary measures to protect your online activities.
One of the best ways to do this is by using a Virtual Private Network (VPN). A VPN can encrypt your internet traffic, making it difficult for anyone to snoop on your online activities.
In this article, we’ll guide you on how to configure VPN access on your iPhone, which can be a useful tool for anyone looking to secure their online activities on-the-go.
We’ll provide you with step-by-step instructions to ensure a hassle-free setup process. So, let’s get started and secure your online presence.
Here are the steps you have to follow to configure VPN on your iPhone;
Go to “Settings” > “General” > “VPN” > “Add VPN Configuration” > Enter the necessary information > “Done”.
You’ll now see your VPN listed under the “VPN” section of your iPhone’s settings. Tap on the toggle switch to enable the VPN connection.
How to Configure VPN Access on Your iPhone
Table of Contents
VPNs can change the location of your IP address and make it seem as though you are in a different place. This is helpful when you are using public WIFI.
You can use a VPN to look as though you are browsing from a different location so that you won’t be seen using the public network.
Read on to find out How to Configure VPN Access on Your iPhone.
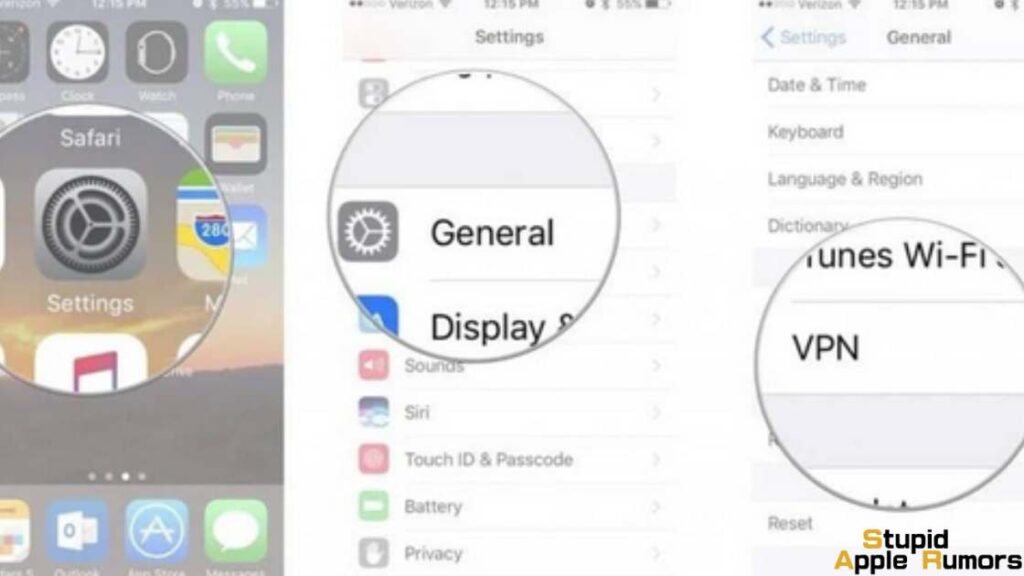
- Open the “Settings” app on your iPhone.
- Scroll down and tap on “General” to access the general settings options.
- Scroll down to the bottom of the General settings page and tap on “VPN.”
- On the VPN page, tap on “Add VPN Configuration.”
- You will now be presented with a list of VPN types to choose from: IKEv2, IPSec, and L2TP. Choose the VPN type that your VPN provider supports. If you’re not sure, you can contact your VPN provider for assistance.
- After choosing the VPN type, you will be prompted to enter the VPN configuration details.
- In the “Description” field, you can give your VPN a name that you can easily recognize.
- In the “Server” field, enter the server address provided by your VPN provider.
- If your VPN requires a username and password for authentication, enter them in the “Account” and “Password” fields respectively.
- If your VPN requires a shared secret or pre-shared key, enter it in the “Shared Secret” field.
- If your VPN requires a certificate, tap on the “Certificate” field and select the certificate file provided by your VPN provider.
- If your VPN requires a proxy, tap on the “Proxy” field and enter the necessary information.
- After entering all the necessary information, tap on “Done” to save the VPN configuration.
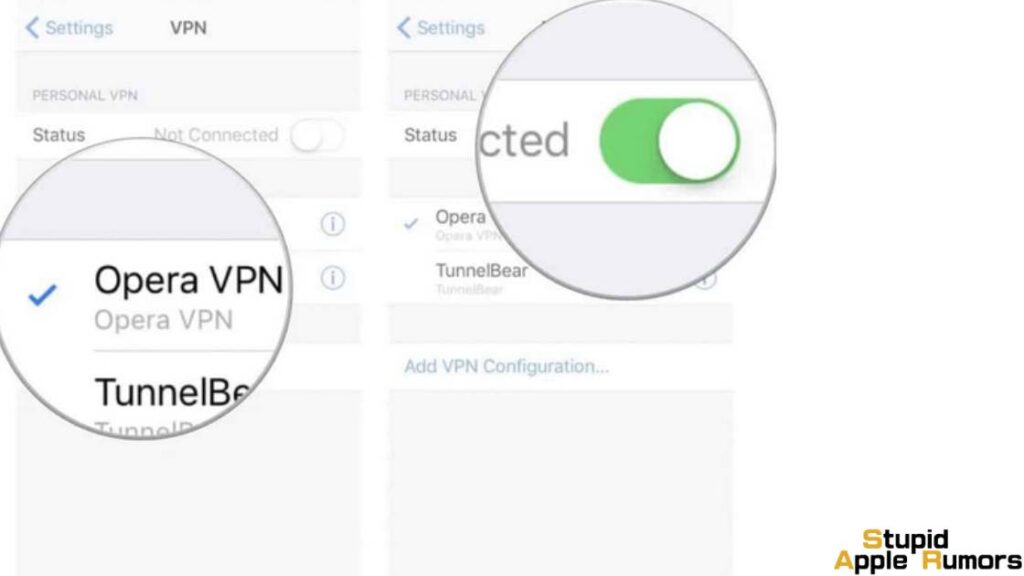
- You will now see your VPN listed under the “VPN” section of your iPhone’s settings.
- To connect to the VPN, tap on the toggle switch next to the VPN name.
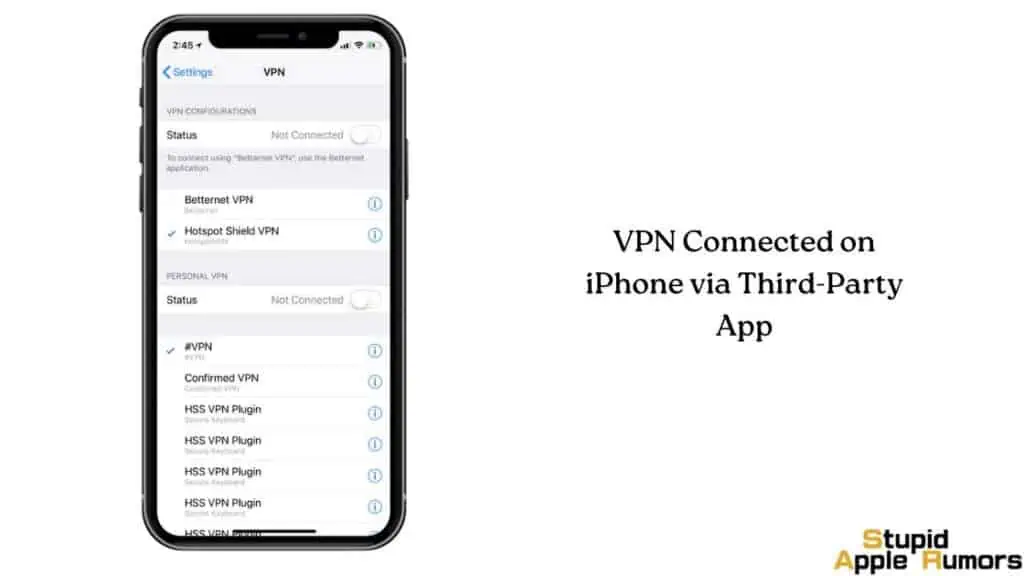
- Once you’ve successfully connected to the VPN, you’ll see a “VPN” icon in the status bar at the top of your iPhone’s screen.
You can use this VPN whenever you want by opening the Settings app and navigating to VPN which is under other network connections types. You can change to different configurations depending on your need, using the above steps. If the connection is secure, a VPN indicator appears on your notification bar near icons like Wi-Fi, and mobile carriers.
Check out the latest iPhone on Amazon!
How to Configure VPN Access on Your iPhone Using a VPN app
This is the more straightforward way of using a VPN. You can choose a reputable VPN service provider and download their app on your iPhone.
Most apps are simple, you can just toggle on the VPN as soon as you open the app for instant safe and secure internet access.
Apps like TunnelBear, ExpressVPN, NordVPN all are great services with paid and free plans. I would recommend using the paid services because of the lack of advanced controls, ads, data caps, and slower speeds.
Good VPN apps also allow you to select the region you want to connect to allow you to access restricted content. VPN Apps also allow you to use their service on multiple devices, like your iPhone, iPad, Mac, etc., helping with convenience and ease of use.
- Search and install the VPN service app you want to use from the App Store.
- Open the VPN service app you installed.
- It will request you to sign up if you are a new user or you could just log in.
- There will be a passcode or Touch ID or Face ID prompt to give permission for the app to configure your VPN settings.
- You can select the servers you want to connect or connect to the default or fastest server the app offers. You are now safe to browse the internet through your own Virtual Private Network.
- To know that you are connected, a VPN icon will appear on the notification bar.
VPN apps provide some extra nifty features too, a kill switch is one, which lets you disconnect your apps from the if VPN gets disconnected. This ensures that your IP address or location is never exposed, even for a second.
There are other features like auto-connect which lets you connect through a VPN whenever you are on the internet. Free VPNs won’t have these features and they will always have a performance penalty, which is why a paid service is recommended.
Remember to turn off the VPN whenever you are not connected to the internet or don’t want to use it. This helps to save some of your device’s battery life. Also, a poor VPN connection can increase internet latency and usage. It is also better to turn it off when not needed or if you are on a limited, free VPN plan.
Click here to download Tunnelbear on iPhone
Click here to download NordVPN on iPhone
Click here to download ExpressVPN on iPhone
How to Choose a VPN Provider for iPhone?
With the number of VPN providers out there, it can be a daunting task to choose one for yourself. It can be easier if you know what makes a good VPN. Look for these features in a VPN,
Servers – The number of servers available directly affects the connection performance of a VPN, the more the better. Servers should also be spread across the world rather than being in a few countries, this allows you to connect to different countries. The more the servers, the better and faster your internet connection will be.
Simultaneous Connections – If you are getting a VPN for your entire family, then choose one that allows you to connect to many devices at once. Most VPNs offer 5-10 simultaneous connections, but some offer unlimited connections so if you want to connect multiple devices then choose accordingly.
Privacy – VPNs serve two main purposes, privacy, and access to geo-restricted content. VPNs can hide your IP address so that you can’t be tracked by advertisers, ISPs, and hackers too.
While VPNs help you from other trackers, some have been found guilty of logging your data themselves which is a privacy threat. Some VPNs advertise that they don’t log your data, but check 3rd party reviews to be sure if privacy is of the utmost concern for you.
Support – When it comes to support, some VPNs offer 24/7 support and some don’t so choose ones with better support.
Pricing – The better VPNs with larger numbers of servers and good support usually cost more, but this is something you have to decide for yourself. Choose one in your budget, and if you can’t decide, most VPNs offer free trials so test before buying or subscribing.
What are the Benefits of Using a VPN on an iPhone?
VPNs are great for privacy and security. A VPN masks your IP address and routes you through its servers so that advertisers, ISPs, and hackers can’t track you and your data. This helps with keeping your data private and saving you from any online attacks.
- Enhanced security: One of the primary benefits of using a VPN on an iPhone is that it can enhance your security by encrypting your internet traffic. This makes it difficult for hackers, governments, or other entities to intercept or monitor your online activities.
- Privacy protection: VPNs can also protect your privacy by masking your IP address and location. This can be especially useful if you’re using public Wi-Fi networks, where your online activities can be monitored by other users or the network administrator.
- Access to geo–restricted content: By connecting to a VPN server in a different location, you can access geo-restricted content that would otherwise be unavailable in your region. This includes streaming services, social media platforms, and other websites or apps that are restricted in certain countries.
- Improved internet speed: In some cases, using a VPN can actually improve your internet speed. This is because VPNs can bypass ISP throttling, which is a practice where internet service providers intentionally slow down certain types of internet traffic.
- Multiple device support: Many VPN providers offer support for multiple devices, which means you can use the same VPN account on your iPhone, iPad, Mac, or other devices. This can be especially useful if you need to protect multiple devices with one VPN account.
VPN hides the IP address of your iPhone so that you can browse the internet anonymously. This helps with privacy. It also hides or relocates where you are accessing the internet from. This helps in not being able to trace you or your network.
What VPN Protocols and Connection Types are Supported on the iPhone?
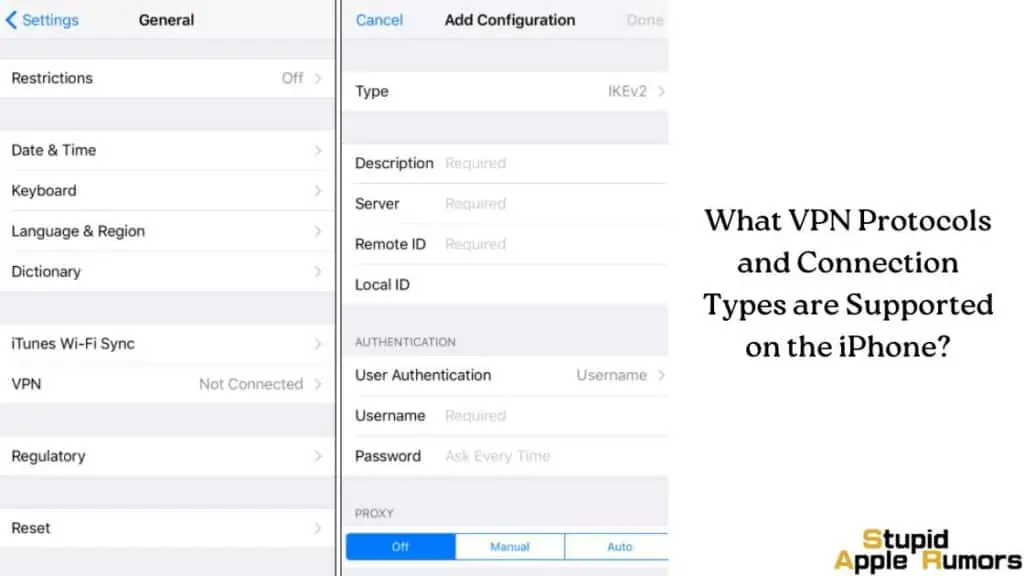
iPhone offers some of the finest VPN services that connect using L2TP, PPTP, and IPsec connection protocols. Using a VPN on your iPhone provides advantages like
- You can browse the internet safely, securely, and privately without prying eyes on you.
- It can mask your current location so that you are safe from trackers.
- It will keep your information safe when on an insecure public Wi-Fi hotspot.
- You can access restricted videos/websites that are blocked in your region.
iPhones offer different VPN types, check them out below.
- IKEv2: Internet Key Exchange version 2 (IKEv2) is a popular VPN protocol that is natively supported on iOS devices. It is known for its fast connection times and reliability, making it a popular choice for mobile VPNs.
- OpenVPN: OpenVPN is an open-source VPN protocol that is highly configurable and provides strong encryption. However, it requires the installation of a third-party app or client to be used on an iPhone.
- L2TP/IPSec: Layer 2 Tunneling Protocol (L2TP) is combined with Internet Protocol Security (IPSec) to create a secure VPN connection. It is natively supported on iOS and is known for its simplicity and ease of use.
- PPTP: Point-to-Point Tunneling Protocol (PPTP) is an older VPN protocol that is still supported on iOS but is generally considered less secure than newer protocols like IKEv2 or L2TP/IPSec.
- WireGuard: WireGuard is a newer, open-source VPN protocol that is designed for modern high-speed networks. It is known for its fast connection times and simplicity, but requires a third-party app or client to be used on an iPhone.
The specific VPN connection you choose will depend on your security needs, performance requirements, and the available options from your VPN service provider.
What is iCloud Private Relay – Apple’s Alternative to a VPN
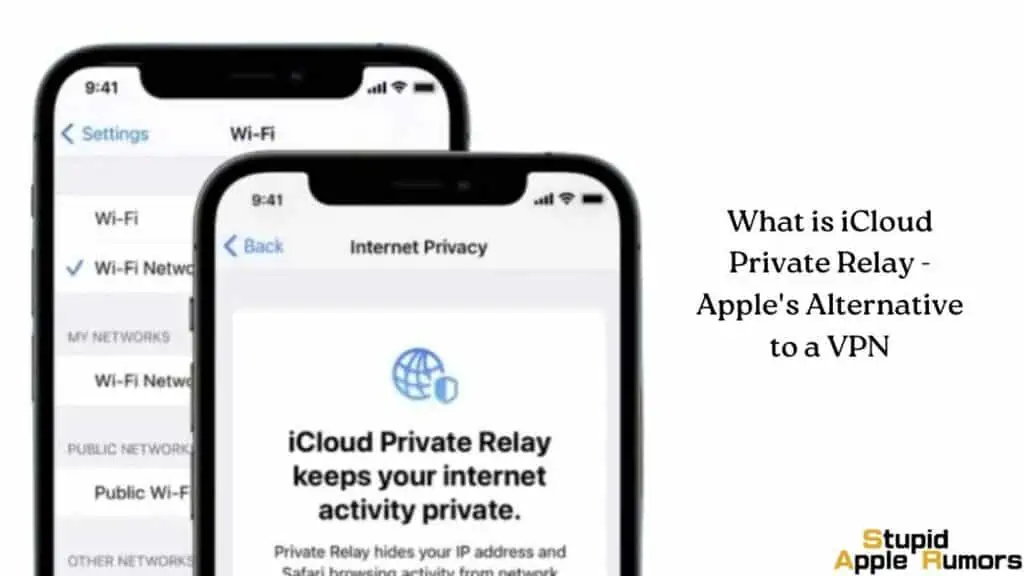
Apple’s iCloud Private Relay is a new privacy feature that is available to users with an iCloud+ subscription. It is designed to enhance the privacy and security of users’ internet traffic by encrypting it and routing it through two separate internet relays.
When a user enables iCloud Private Relay, their internet traffic is first encrypted and sent to a third-party relay server. The third-party server then forwards the encrypted traffic to a second relay server, which decrypts it and sends it to its final destination.
By routing internet traffic through two separate servers, iCloud Private Relay makes it much more difficult for anyone to intercept or monitor the user’s online activities. The third-party relay server only knows the user’s IP address, while the second relay server only knows the destination of the user’s internet traffic.
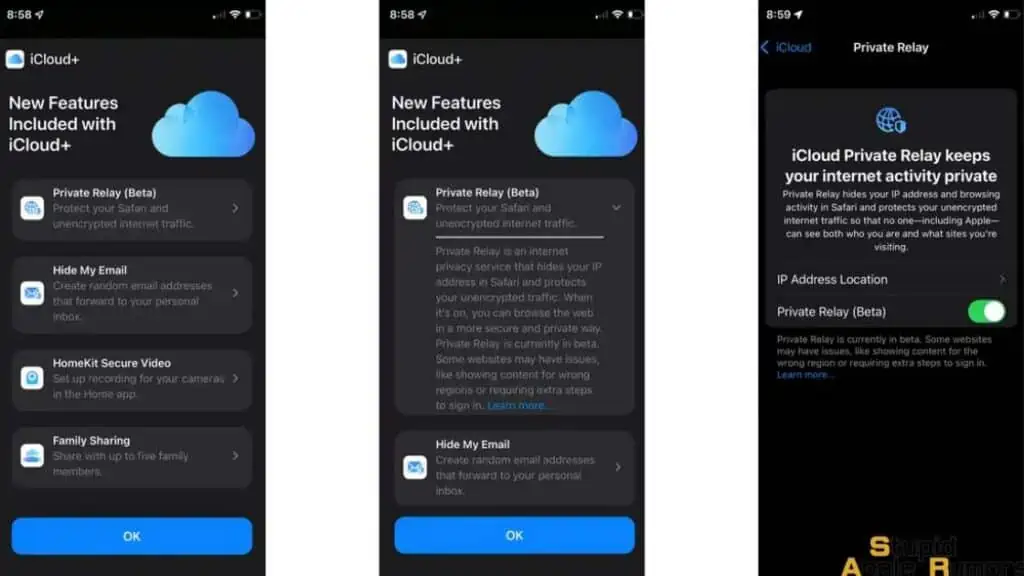
This means that even Apple cannot see the user’s internet traffic when iCloud Private Relay is enabled. Additionally, the feature also prevents advertisers and other third-party trackers from tracking the user’s online activities by obscuring the user’s IP address.
However, it is important to note that iCloud Private Relay is not a replacement for a VPN (Virtual Private Network) and has some limitations. For example, iCloud Private Relay only encrypts and routes certain types of internet traffic, such as web browsing and email. It does not encrypt or route all internet traffic, such as traffic from third-party apps or certain protocols like BitTorrent.
5 Quick Steps on How to Setup iCloud Private Relay on iPhone
- Ensure that you have an iCloud+ subscription: iCloud Private Relay is a feature that is only available to users with an iCloud+ subscription.
- If you don’t already have an iCloud+ subscription, you can upgrade your iCloud account by going to Settings > [your name] > iCloud > Manage Storage > Change Storage Plan.
- Update your iPhone to the latest iOS version: iCloud Private Relay requires iOS 15 or later.
- To check if your iPhone is up-to-date, go to Settings > General > Software Update.
- Turn on iCloud Private Relay: To turn on iCloud Private Relay, go to Settings > [your name] > iCloud > Private Relay. Then, toggle the switch next to “Private Relay” to the On position.
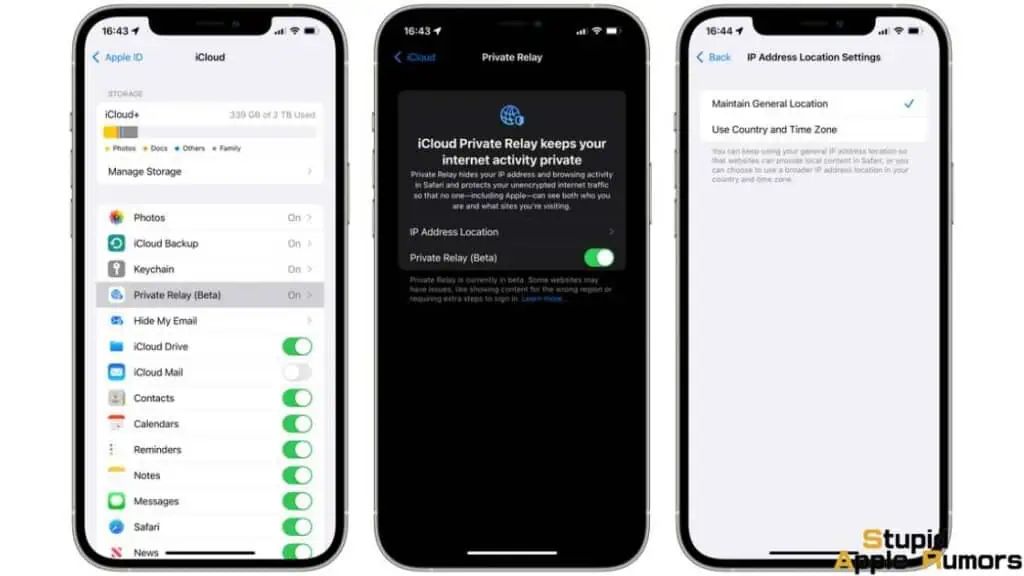
- Choose your Private Relay settings: You can choose to use iCloud Private Relay in two modes: “Protect Internet traffic on this device” or “Protect all devices on my account“.
- The former option encrypts only the internet traffic on your device, while the latter encrypts all the internet traffic on any device that is signed in to your iCloud account.
- Enable Private Relay for specific apps: You can also choose to enable Private Relay for specific apps.
- To do this, go to Settings > [your name] > iCloud > Private Relay, and then scroll down to the “App-Specific Private Relay” section. From there, you can toggle the switch next to the app you want to enable Private Relay for.
Once you’ve completed these steps, iCloud Private Relay will be enabled on your iPhone, and your internet traffic will be encrypted and routed through two separate servers to help enhance your online privacy and security.
It’s important to note that iCloud Private Relay may affect the performance of some internet services or apps, and may not be available in all regions.
How to Configure VPN Access on Your iPhone – Final thoughts
VPN is a useful tool for your iPhone if you are always on the internet. It makes your connection safe and secure by hiding your information off the internet.
It helps with accessing restricted content on your iPhone. This is because your government or some big company decides what you can and cannot watch and you don’t have to put up with it.
And these benefits come at a small cost or in some cases free. Manually configuring a VPN on your iPhone can give you greater control over servers. If you are not tech-savvy, VPN apps provide excellent service and great features to keep your privacy private and not public.
Hope our guide on How to Configure VPN Access on your iPhone was helpful.
Also Read:

